lol
In the 2000’s, I recall the whole “body part in the chili” claim about Wendy’s food. Sort of redefined the concept of “finger food.”
lol
In the 2000’s, I recall the whole “body part in the chili” claim about Wendy’s food. Sort of redefined the concept of “finger food.”
OK, this isn’t super funny, but it’s SFW. Here you go, Excel geeks.

I just watched that yesterday!
Did you also see it on Reddit?
No, it popped up on YouTube for me. Or there was a video I was watching that referenced it or something. I don’t really go on reddit.
It’s Jamie Ross from Law & Order!
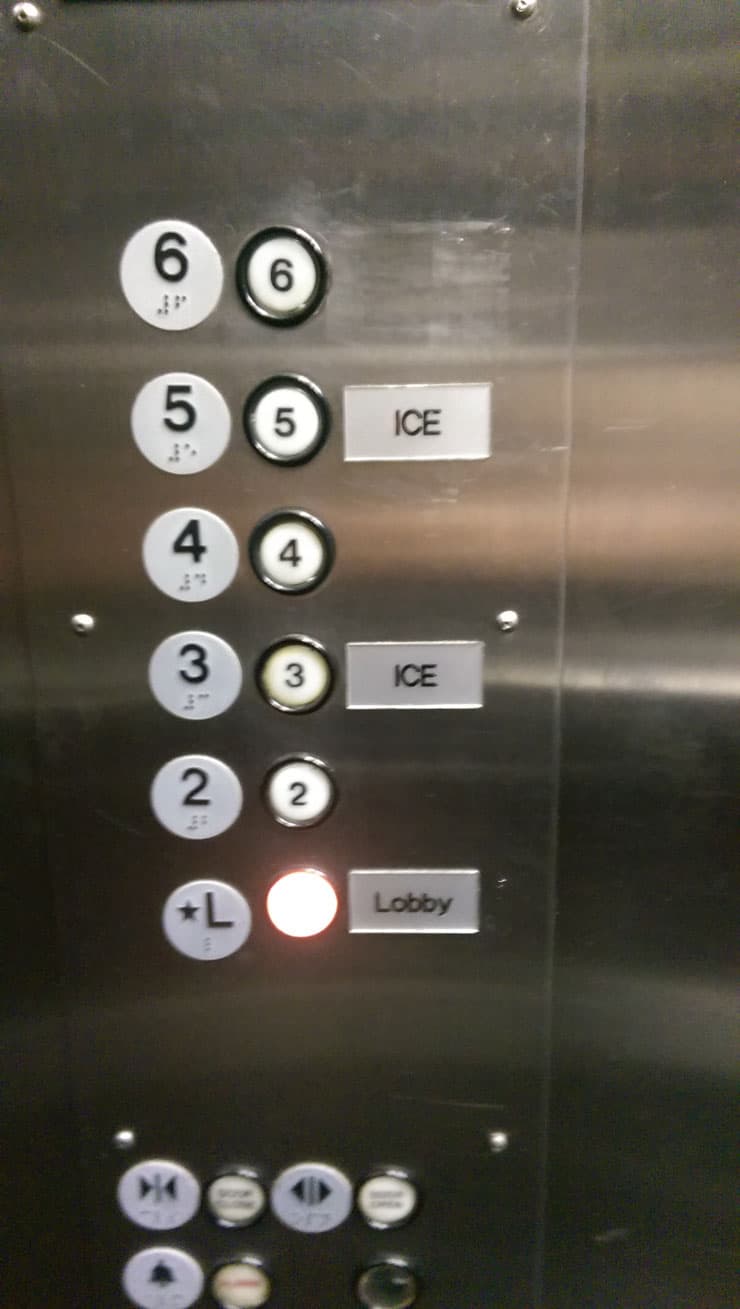
I miss the problem with picture 2. Probably there are ice machines on 3 and 5, not other floors.
Or is the issue supposed to be the actual button you push for the Lobby? Not sure what’s going on there.
I was thinking Ice ice baby
Try humming the music to Under Pressure (Queen featuring David Bowie) when you read it again.
You seriously overestimate my knowledge of Queen and/or David Bowie. My wife and kids would say you seriously overestimate my ability to hum.
OK, remedial classic rock history lesson for SteveW…
In 1981 a band called Queen and David Bowie recorded a song together called Under Pressure. It was a decent sized hit. It’s still payed on classic rock radio to this today.
In the early 1990s rap artist ( I use that term loosely) Vanilla Ice had a one-hit wonder type of hit with Ice Ice Baby which basically stole much of the music from Under Pressure and replaced the original lyrics with basic, mediocre rap style lyrics. Queen sued and won royalties for Vanilla’s song.
The pic posted had the words “ICE - ICE - Lobby” punctuated in a manner similar to the lyrics of “Ice Ice Baby”, thus reminiscent of the Vanilla Ice song.
My post was harkening back not directly to the Vanilla Ice song, but to the original Queen/David Bowie song’s source material, as a hint to the rap song.
Sure. But how is this funny? 
but this does remind me. With so many people wfh these days, lots of cubes have been converted (abandoned) to “hotel” cubes and are now labeled as such. I roamed the building trying to find 3 in a row, with the plan of changing the signs to read Hotel, Motel, Holiday Inn. Alas, there are not 3 hotel cubes in a row.

To people of a certain age, anything that says “ice” two times in a row will result in an involuntary “baby” call back.
But good work on the subtle hint.
What time is it?
From the sundial to the smartwatch, clocks are an ever-evolving way to tell time. There are a variety of clocks on the market that can serve as a functional household item and a form of home décor. Here are the most common types of clocks on the market:
For centuries, clockmaking was a highly skilled trade, but the timepieces have evolved with the help of technology and automation, and now anyone can become a clockmaker. Widely available mechanical clock parts make building your own custom clock a fun and easy do-it-yourself project. Here are some DIY clock ideas to stoke your imagination:
Book clock : This unique clock that spotlights an attention-grabbing tome are a favored timepiece among bibliophiles. The decorative clock features a new or vintage book repurposed into a clock face.
Bicycle clock : A bicycle wheel serves as the clock face of this sporty and functional piece of home décor that may require extra living space to stage.
Color block clock : Color block clocks can serve as a bold focal point for modern design enthusiasts. Simply paint one-half of the face of a wooden clock a solid color. This elegant and modern wall clock can practically function as a piece of wall art or a focal point on a gallery wall.
Chalkboard clock : A chalkboard clock is a fun and functional clock design that you can repeatedly redesign because of its erasable chalkboard material. Simply wipe it clean and draw new designs on it. The clock base is often hexagon-shaped, which makes for an eye-catching focal point for any wall.
Concrete clock : Turn a slab of humble concrete into industrial chic wall decorations. The addition of metallic hands upgrades this clock into refined and modern art.
Floating numbers clock : By sticking the numbers and clock hands directly onto the wall, this minimalist, modern clock looks like it is floating.
Pallet board clock : Use repurposed pallet wood to create a farmhouse clock. This large clock makes a statement whether you hang it in the entryway, kitchen, or living room.
Paper plate clock : The paper plate clock is a timeless craft to make with young children, which can function as a hands-on tutorial for learning to tell time and a blank canvas for a child to decorate.
Wood slab clock : Use a cross-section of a tree trunk to make a rustic wall clock. This wooden wall clock is the perfect addition to a nature lover’s living room wall décor.
Before you embark on your DIY wall clock project, you’ll need to gather the following clock parts and building supplies, all of which you can order online or find at your local hardware store:
Once you have all your materials, you are ready to begin your clock-making project. You can adapt these basic instructions to fit whatever clock plans you have in mind: